Deprecated
This blog has been deprecated, proceed to go to my new Blog.
Welcome to this detailed tutorial to learn how install Oracle’s Java JDK (Java Development Kit) in Linux, I consider it a powerful operating system with a huge community out there!. Now, about the Linux’s distribution, I am going to use Fedora Core.
About the releases for each software, I am going to use the follow (the latest available while I am writing this tutorial)
- Fedora Core release 17.You can get it on Get Fedora.
- Oracle’s Java JDK releases:
- 6 update 32
- 7 update 04
You can get it on Java SE Downloads.
Note: I used the follow steps instructions since Fedora Core release 11 (really since 01), therefore it work fine for 11,12,13,14,15.
Step 01: Getting Oracle’s Java JDK
Just go to Java SE Downloads. You should see two sections to get the two releases available. Below we have two images showing each release respectively (the update number for each one would change in the future of course)

Figure 01: JDK 7 update 04

Figure 02: JDK 6 update 32
Then, to get each one practically you must do click in the button named download located below of the JDK label. In any case, you must see for both releases all the operating systems available like Linux, Mac OS X, Solaris and Windows, furthermore almost all offering the option to get the software based in an architecture of 32 and 64 bits.
Since I am going to work with Linux, below we have for each JDK release, the installer versions available for Linux.
| Product / File Description | File Size | Download |
|---|---|---|
| Linux x86 (32-bit) | 64.09 MB | jdk-7u4-linux-i586.rpm |
| Linux x86 (32-bit) | 79.09 MB | jdk-7u4-linux-i586.tar.gz |
| Linux x64 (64-bit) | 64.93 MB | jdk-7u4-linux-x64.rpm |
| Linux x64 (64-bit) | 77.67 MB | jdk-7u4-linux-x64.tar.gz |
Table 01: JDK 7 update 04 for Linux
| Product / File Description | File Size | Download |
|---|---|---|
| Linux x86 (32-bit) | 65.42 MB | jdk-6u32-linux-i586-rpm.bin |
| Linux x86 (32-bit) | 68.42 MB | jdk-6u32-linux-i586.bin |
| Linux x64 (64-bit) | 65.65 MB | jdk-6u32-linux-x64-rpm.bin |
| Linux x64 (64-bit) | 68.7 MB | jdk-6u32-linux-x64.bin |
Table 02: JDK 6 update 32 for Linux
We have for each release four options, two of 32 bits and two of 64 bits, making the total of four. I am going to work for both releases with the architecture based on 32 bits, then it left us for each release with two options to choice, how you can see below.
| Product / File Description | File Size | Download |
|---|---|---|
| Linux x86 (32-bit) | 64.09 MB | jdk-7u4-linux-i586.rpm |
| Linux x86 (32-bit) | 79.09 MB | jdk-7u4-linux-i586.tar.gz |
| Linux x86 (32-bit) | 65.42 MB | jdk-6u32-linux-i586-rpm.bin |
| Linux x86 (32-bit) | 68.42 MB | jdk-6u32-linux-i586.bin |
Table 03: JDK 7 update 04 / JDK 6 update 32 for Linux based on architecture of 32 bits
Can you see something special in the installers names?. Yes, It is about the file’s extension. JDK 7 has .rpm and tar.gz meanwhile JDK 6 has -rpm.bin and .bin.
Therefore, I am going to work with these two follow installers, proceed you do the same:
- jdk-7u4-linux-i586.tar.gz
- jdk-6u32-linux-i586.bin
To download each one, you must first select the radio button named Accept License Agreement, then you can just do click in the files suggested above. For a better understanding see the follow four images.

Figure 03: Downloading Process JDK 7 update 04 before to choice Accept License Agreement

Figure 04: Downloading Process JDK 7 update 04 after to choice Accept License Agreement

Figure 05: Downloading Process JDK 6 update 32 before to choice Accept License Agreement

Figure 06: Downloading Process JDK 6 update 32 after to choice Accept License Agreement
I have chosen to download these installers into my Desktop directory how you can see below.
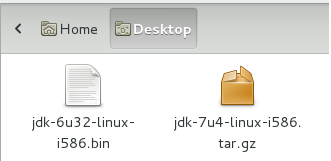
Figure 07: Downloaded JDK 7 update 04 / JDK 6 update 32 installers for Linux based on architecture of 32 bits on Desktop directory
Step 02: Knowing your already JDK installed – Part I (Optional)
If you are thinking why the hell I’m reading this tutorial if Fedora Core already came with Java installed. The answer is because Fedora Core has the OpenJDK. More information about this project, you can learn in OpenJDK. I don’t want discuss why you should keep or remove OpenJDK from Linux. The point is, if you want work with Oracle’s Java JDK, this tutorial is for you!.
To know what JDK you have already available in Linux, open your first terminal 01 and write the command java -version, below you can see my result output.
[section1@localhost ~]$ java -version
java version "1.7.0_b147-icedtea"
OpenJDK Runtime Environment (fedora-2.1.fc17.6-i386)
OpenJDK Client VM (build 22.0-b10, mixed mode)
[section1@localhost ~]$
Listing 01: Terminal 01 – Knowing the current JDK installed in Fedora Core
Step 03: Knowing your already JDK installed – Part II (Optional)
Now that you know what JDK type you have available, an obvious question would be, where is located?. To know this, in the terminal 01 execute the command which java.
[section1@localhost ~]$ which java
/usr/bin/java
[section1@localhost ~]$
Listing 02: Terminal 01 – Knowing the location of the current JDK installed in Fedora Core
Step 04: Creating the installation directory
I am going to create and work in the follow path directory whiteroom/sun/jdk. Even when Oracle adquired Sun Microsystems I keep sun how part of my path directory.
I am going to re use the terminal 01 to create the path directory suggested above, but before, be sure to be located in your home user directory, I mean, /home/username. Bear in mind, when you open a new terminal by default it is already located in your home user directory. If you want confirm explicitly where you are located in some terminal, you can use the command pwd.
[section1@localhost ~]$ pwd
/home/section1
[section1@localhost ~]$
Listing 03: Terminal 01 – Knowing the current location within a terminal
My username is section1. Then we can now create the path directory. In the current terminal 01 execute the follow command
mkdir -p whiteroom/sun/jdk.
[section1@localhost ~]$ mkdir -p whiteroom/sun/jdk
[section1@localhost ~]$
Listing 04: Terminal 01 – Creating the path directory whiteroom/sun/jdk
Below the new directory created after of the command execution.

Figure 08: The path directory whiteroom/sun/jdk empty
Step 05: Copying the installers to our customized installation directory
Proceed to copy (or move if you want it) the two JDK installers to our path directory whiteroom/sun/jdk. You must see the follow.
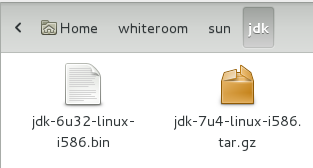
Figure 09: The path directory whiteroom/sun/jdk with the two JDK installers
Step 06: Moving to our customized installation directory
In the terminal 01 execute the follow command cd whiteroom/sun/jdk
[section1@localhost ~]$ cd whiteroom/sun/jdk
[section1@localhost ~]$
Listing 05: Terminal 01 – Moving to the path directory whiteroom/sun/jdk
You can know our new location executing again the command pwd in the terminal 01.
[section1@localhost jdk]$ pwd
/home/section1/whiteroom/sun/jdk
[section1@localhost jdk]$
Listing 06: Terminal 01 – knowing the current location within a terminal
Step 07: Changing the permission to the bin file
To understand this step instruccion, first in the terminal 01 execute the follow command ls -ls
[section1@localhost jdk]$ ls -ls
total 151056
70068 -rw-r--r--. 1 section1 section1 71746385 Jun  9 20:32 jdk-6u32-linux-i586.bin
80988 -rw-r--r--. 1 section1 section1 82927766 Jun  8 19:31 jdk-7u4-linux-i586.tar.gz
[section1@localhost jdk]$
Listing 07: Terminal 01 – listing and knowing the permission for all the existing files within the whiteroom/sun/jdk path directory
I assume some basic knowledge about Linux by the reader, therefore, do realize yourself that the .bin file has no permission to be executed. To confirm this situation, let’s try to execute our .bin file, therefore execute the command ./jdk-6u32-linux-i586.bin in the terminal 01.
[section1@localhost jdk]$ ./jdk-6u32-linux-i586.bin
bash: ./jdk-6u32-linux-i586.bin: Permission denied
[section1@localhost jdk]$
Listing 08: Terminal 01 – Try to execute the .bin file
Now you can see clearly we got the error message Permission denied for the .bin file. To fix this problem again in the same terminal 01 execute the command chmod +x jdk-6u32-linux-i586.bin.
[section1@localhost jdk]$ chmod +x jdk-6u32-linux-i586.bin
[section1@localhost jdk]$
Listing 09: Terminal 01 – Changing the permission for the .bin file
To confirm this change again in the terminal 01 execute the command ls -ls
[section1@localhost jdk]$ ls -ls
total 151056
70068 -rwxr-xr-x. 1 section1 section1 71746385 Jun  9 20:32 jdk-6u32-linux-i586.bin
80988 -rw-r--r--. 1 section1 section1 82927766 Jun  8 19:31 jdk-7u4-linux-i586.tar.gz
[section1@localhost jdk]$
Listing 10: Terminal 01 – listing and knowing the permission for all the existing files within the whiteroom/sun/jdk path directory
Do realize yourself that we added the execution (x) permission for the .bin file.
Note: practically is mandatory for us give this permission to our installers with extensions .bin and .sh, therefore is not necessary for our .tar.gz file.
Step 08: Installing the .bin file
Then, again in the terminal 01 execute the command ./jdk-6u32-linux-i586.bin.
[section1@localhost jdk]$ ./jdk-6u32-linux-i586.bin
...
Java(TM) SE Development Kit 6 successfully installed.

Product Registration is FREE and includes many benefits:
* Notification of new versions, patches, and updates
* Special offers on Oracle products, services and training
* Access to early releases and documentation

Product and system data will be collected. If your configuration
supports a browser, the JDK Product Registration form will
be presented. If you do not register, none of this information
will be saved. You may also register your JDK later by
opening the register.html file (located in the JDK installation
directory) in a browser.

For more information on what data Registration collects and
how it is managed and used, see:
http://java.sun.com/javase/registration/JDKRegistrationPrivacy.html

Press Enter to continue.....


Done.
[section1@localhost jdk]$
Listing 11: Terminal 01 – Installing the .bin file
The three dots (…) shown just below of the command execution represent a long output when you execute the command indicated.
Note: You must press Enter to complete the installation process, just see above in the final part of the result output.
Be aware that your default Web Browser going to show a page to let you register your JDK.

Figure 10: Java Development Kit (JDK) Registration
After of the execution of the command a new directory named jdk1.6.0_32 must appear, like shown below.

Figure 11: the new jdk1.6.0_32 directory created after to install the jdk-6u32-linux-i586.bin file
Step 09: Unpacking the .tar.gz file
Now is the turn to work around with the .tar.gz file, this file not requires some special permission, we only need to unpack it. Therefore again in the terminal 01 execute the command tar -zxvf jdk-7u4-linux-i586.tar.gz
[section1@localhost jdk]$ tar -zxvf jdk-7u4-linux-i586.tar.gz
...
[section1@localhost jdk]$
Listing 12: Terminal 01 – Unpacking the .tar.gz file
The three dots (…) represent a long output when you execute the command indicated.
After of the execution of the command a new directory named jdk1.7.0_04 must appear, like shown below.

Figure 12: the new jdk1.7.0_04 directory created after to unpack the jdk-7u4-linux-i586.tar.gz file
Step 10: Opening and Editing the .bash_profile file
This step instruction is important. Open a terminal 02, you can do it in two ways:
- Combination of keys within your terminal 01, it is Shift + Control + T
- Through the Menu Bar, and proceed to select File / Open Tab
If you did realize, the new terminal 02 is located in the path directory whiteroom/sun/jdk. For this step instruction is mandatory be located into the home user directory. Therefore move to the /home/section1 directory. Just execute the command cd /home/section1/
[section1@localhost jdk]$
[section1@localhost jdk]$ cd /home/section1/
[section1@localhost ~]$
Listing 13: Terminal 02 – Moving to the /home/section1 directory
Now we can open the .bash_profile file
Warning: Be aware, it is an important file, before to do some modification or edition to this file, do a backup, even if you are an experimented user in Linux.
To open it, in the terminal 02 execute the command gedit .bash_profile
[section1@localhost ~]$ gedit .bash_profile
[section1@localhost ~]$
Listing 14: Terminal 02 – Opening the .bash_profile
Note: Since the file name starts with a dot, it would be considered like a hidden file
Once executed the command it should open the file with gedit with the follow possible content.
# .bash_profile

# Get the aliases and functions
if [ -f ~/.bashrc ]; then
	. ~/.bashrc
fi

# User specific environment and startup programs

PATH=$PATH:$HOME/.local/bin:$HOME/bin

export PATH
Listing 15: The .bash_profile before to be edited
Note: I just installed Fedora Core 17 into my two PC’s, therefore this file has none edition, therefore your .bash_profile‘s content could be different.
Then do the follow editions (Remember, you should do a backup before)
# .bash_profile

# Get the aliases and functions
if [ -f ~/.bashrc ]; then
	. ~/.bashrc
fi

# User specific environment and startup programs

PATH=$PATH:$HOME/.local/bin:$HOME/bin
#export PATH

JAVA_HOME="/home/section1/whiteroom/sun/jdk/jdk1.7.0_04"
export JAVA_HOME

export PATH=${JAVA_HOME}/bin:${PATH}
unset USERNAME
Listing 16: The .bash_profile after to be edited
Below I will highlight the main editions:
- Comment with # the exportation of PATH
- Create the JAVA_HOME variable and assign the value of the JDK installation directory.
Here we have two possibles options:- /home/section1/whiteroom/sun/jdk/jdk1.7.0_04
- /home/section1/whiteroom/sun/jdk/jdk1.6.0_32
I am going to work with jdk1.7.0_04
- Export the JAVA_HOME variable
- Assign and Export the new and edited PATH variable with the value of the JAVA_HOME variable and the old value of the PATH variable respectively.
Note:Be aware that in the point four, the order for the declaration variables is important.
Proceed to save the new current content of the .bash_profile and close it.
Step 11: Executing the new content of the .bash_profile file
This step instruction is important. Once saved and closed the .bash_profile file, proceed to execute with the command . .bash_profile within the same terminal 02. Remember that terminal 02 is working in the home user directory /home/section1. And is really mandatory be located in /home/section1 because the .bash_profile file is located there.
[section1@localhost ~]$ . .bash_profile
[section1@localhost ~]$
Listing 17: Terminal 02 – Executing the .bash_profile file after to be edited
Now, let’s see something interesting, execute the command echo $JAVA_HOME within the terminal 02
[section1@localhost ~]$ echo $JAVA_HOME
/home/section1/whiteroom/sun/jdk/jdk1.7.0_04
[section1@localhost ~]$
Listing 18: Terminal 02 – Executing the command echo $JAVA_HOME
Seems fine, right?. Yes. If you got your own value configured for the $JAVA_HOME variable, then, We are OK!. Do the same now for the terminal 01
[section1@localhost ~]$ echo $JAVA_HOME

[section1@localhost ~]$
Listing 19: Terminal 01 – Executing the command echo $JAVA_HOME
None value appear. Why?. Well, It is related with Linux, It is not an error!. I dont want discuss the theme here, but to give you a quick idea, the execution of the .bash_profile file with the new editions only worked for the terminal 02, but the terminal 01 seems be working with the old version of the .bash_profile file yet. Now just playing, create a new terminal 03, not care if you create this new terminal from the terminal 01 or terminal 02, the point is, we still are getting an empty value for the $JAVA_HOME variable. The important is that our changes is OK.
Even more, if you understood the previous paragraph, in the terminal 01 and terminal 02 execute the commands java -version and which java respectively. You are going to see that for the terminal 01 it keeps the old values shown in Listing 01 and Listing 02, but the terminal 02 show our new editions applied.
Step 12: Re-Login
OK, just re-login your user session to apply our new editions. Until here, practically all is completed, but I encourage you to keep reading the rest of the tutorial to improve your own knowledge.
Step 13: Checking the Java RPM already installed (Optional)
Open the terminal 01 (remember, you has re-logged). Execute again the commands java -version and which java, you must see our new customized configuration settings applied. But you must know that we have OpenJDK installed yet. Even more, we dont know how this OpenJDK is installed in Fedora Core.
To know this, in the terminal 01 execute the command rpm -qa | grep java
[section1@localhost ~]$ rpm -qa | grep java
java-1.7.0-openjdk-1.7.0.3-2.1.fc17.6.i686
tzdata-java-2012c-1.fc17.noarch
[section1@localhost ~]$
Listing 20: Terminal 01 – Executing the command rpm -qa | grep java in Fedora Core 17
Note: Your result output could be different, because it depends according the configuration settings you have used when you installed your Fedora Core 17. In my case I only got two results.
It depends in the release too, below I show the result outputs for Fedora Core release 14 and 15 respectively
[section1@localhost ~]$ rpm -qa | grep java
tzdata-java-2010k-1.fc14.noarch
java-1.5.0-gcj-1.5.0.0-34.fc14.i686
java_cup-0.11a-4.fc13.noarch
java-1.6.0-openjdk-1.6.0.0-44.1.9.1.fc14.i686
java-1.6.0-openjdk-plugin-1.6.0.0-44.1.9.1.fc14.i686
[section1@localhost ~]$
Listing 21: Terminal 01 – Executing the command rpm -qa | grep java in Fedora Core 14
[section1@localhost ~]$ rpm -qa | grep java
java-1.6.0-openjdk-javadoc-1.6.0.0-57.1.10.1.fc15.i686
java-1.6.0-openjdk-devel-1.6.0.0-57.1.10.1.fc15.i686
ant-javamail-1.8.2-3.fc15.noarch
tzdata-java-2011d-3.fc15.noarch
java_cup-0.11a-6.fc15.noarch
java-1.6.0-openjdk-1.6.0.0-57.1.10.1.fc15.i686
java-1.5.0-gcj-1.5.0.0-35.fc15.i686
[section1@localhost ~]$
Listing 22: Terminal 01 – Executing the command rpm -qa | grep java in Fedora Core 15
If you do realize, practically the three results output show the follow pattern java-1.#.0-openjdk-1.#.0…..fc1#.#.i686, futhermore realize that Fedora Core releases 14 and 15 has the java-1.5.0-gcj-1.5.0.0… too.
Note: It means that for these two old releases you would remove the OpenJDK 1.6 and GCJ 1.5. (Of course, if you want it.)
Step 14: Removing the Java RPM already installed (Optional)
If you want remove the java-1.7.0-openjdk-1.7.0.3-2.1.fc17.6.i686. Then to do this approach, we must execute the command rpm -e –nodeps java-1.7.0-openjdk-1.7.0.3-2.1.fc17.6.i686 in the terminal 01.
Warning: is really mandatory include –nodeps, without that, some programs with dependency on Java has a high risk to not work any more!!!.
[section1@localhost ~]$ rpm -e --nodeps java-1.7.0-openjdk-1.7.0.3-2.1.fc17.6.i686
error: can't create transaction lock on /var/lib/rpm/.rpm.lock (Permission denied)
[section1@localhost ~]$
Listing 23: Terminal 01 – Trying to remove OpenJDK 1.7.0 with rpm -e –nodeps
The error shown above is expected since we are not a root, proceed to change the user using the command su in the terminal 01.
[section1@localhost ~]$ su
Password:
[root@localhost section1]#
Listing 24: Terminal 01 – Changing to root user
Let’s execute again the command rpm -e –nodeps java-1.7.0-openjdk-1.7.0.3-2.1.fc17.6.i686 in the terminal 01 with the root privileges.
[root@localhost section1]# rpm -e --nodeps java-1.7.0-openjdk-1.7.0.3-2.1.fc17.6.i686
[root@localhost section1]#
Listing 25: Terminal 01 – Trying to remove OpenJDK 1.7.0 with rpm -e –nodeps with root privileges
If we execute again the command rpm -qa | grep java then java-1.7.0-openjdk-1.7.0.3-2.1.fc17.6.i686 must not appear. Try it in your terminal 01.
[root@localhost section1]# rpm -qa | grep java
tzdata-java-2012c-1.fc17.noarch
[root@localhost section1]#
Listing 26: Terminal 01 – Executing the command rpm -qa | grep java after to remove OpenJDK 1.7.0 and with root privileges
How you can see, now, I got only one result and not two anymore.
Let’s return to the not root user, because is normal make our development work without the root privileges, therefore, execute the command exit.
[root@localhost section1]# exit
exit
[section1@localhost ~]$
Listing 27: Terminal 01 – Leaving the root user
Step 15: Checking the final new changes
To confirm all is over successfully, in the terminal 01 execute the commands java -version and which java respectively.
[section1@localhost ~]$
[section1@localhost ~]$ java -version
java version "1.7.0_04"
Java(TM) SE Runtime Environment (build 1.7.0_04-b20)
Java HotSpot(TM) Client VM (build 23.0-b21, mixed mode)
[section1@localhost ~]$
[section1@localhost ~]$ which java
~/whiteroom/sun/jdk/jdk1.7.0_04/bin/java
[section1@localhost ~]$
Listing 28: Terminal 01 – Executing the commands java -version and which java
All is OK, and all is over, congrats!.
Do you remember when we executed the command rpm -qa | grep java after we have optionally removed java-1.7.0-openjdk-1.7.0.3-2.1.fc17.6.i686 and just appear one result?. If yes, realize it was done under the root privileges (#), now we are not a root user anymore, let’s execute the command rpm -qa | grep java again in the terminal 01
[section1@localhost ~]$ rpm -qa | grep java
tzdata-java-2012c-1.fc17.noarch
[section1@localhost ~]$
Listing 29: Terminal 01 – Executing the command rpm -qa | grep java after to remove OpenJDK 1.7.0 and without root privileges
The result is the same.
Final Notes
Congratulations, now you have learned how install Java JDK 6 and 7 into Fedora Core 17.
In other tutorials, I am going to teach you how install Apache Tomcat 7 and other things, be ready!

Great! thanks! work’s me
You’re welcome
Good to know is useful
Kind Regards
awesome! thanks Manuel I have some questions and I think that you have the answers 🙂
Can I have installed java JDK 6 and 7 at the same time and used indistinctly, for example, for software that requires 6 used ver 6 and to anyone who might use the 7 used 7? if so, can you post a article with this issue?
Thanks a lot
Hi Sean
Depends, when you install some tools, these ask for what JDK version you are going to use, and some IDE has the option to change the JRE when you need it
Could you expand your specific case?
Kind Regards
thanks a lot…
You’re welcome. Enjoy it!